Schedule Message Delivery using AWS ActiveMQ and MassTransit
In this article, we are going to talk about a simple publisher/subscriber scenario for schedule message delivery using Amazon MQ ,which is an implementation of Apache ActiveMQ message broker service .To impalement publisher and subscriber we use MassTransit framework.
Prerequisites & Setup
Basic knowledge on AWS Cloud service and basic understanding ASP.NET Core WebAPI and .NET Core .
Basic understanding of the event-driven communication between microservices read my pervious article (Link) and MassTransit Framework (Link)
Source Code
You can download the source code from my Git Repo.
Use Case
Assume that we have an application, Using that application user can create an email notification with schedule delivery time then publisher will publish email notification to the queue, then consumer consume that message given delivery time and trigger the email to the end-user.
If the consumer consumes the message if there is a failure or exception occur system should be able to re-try and if the re-try unsuccessful then move the message to the Error queue.
Amazon MQ
Amazon MQ is a managed message broker service for Apache ActiveMQ and RabbitMQ that makes it easy to set up and operate message brokers on AWS. Amazon MQ reduces your operational responsibilities by managing the provisioning, setup, and maintenance of message brokers for you. (Link)
Apache ActiveMQ
ActiveMQ provide flexibility to send messages through both queues and topics using a single Broker. In point-to-point messaging, the Broker acts as a load balancer by routing each message from the queue to one of the available consumers in a round-robin pattern. When you use pub/sub messaging, the Broker delivers each message to every consumer that is subscribed to the topic.
ActiveMQ from version 5.4 has an optional persistent scheduler built into the ActiveMQ message broker. It is enabled by setting the broker schedulerSupport attribute to true in the Xml Configuration. An ActiveMQ client can take advantage of a delayed delivery by using the following message properties:
| Property name | type | description |
|---|---|---|
| AMQ_SCHEDULED_DELAY | long | The time in milliseconds that a message will wait before being scheduled to be delivered by the broker |
| AMQ_SCHEDULED_PERIOD | long | The time in milliseconds to wait after the start time to wait before scheduling the message again |
| AMQ_SCHEDULED_REPEAT | int | The number of times to repeat scheduling a message for delivery |
| AMQ_SCHEDULED_CRON | String | Use a Cron entry to set the schedule |
ActiveMQ broker setup using AmazonMQ
1. Sign-in to AWS and navigate to the Amazon MQ console.
2. Select broker engine page, choose ActiveMQ, and then choose next.
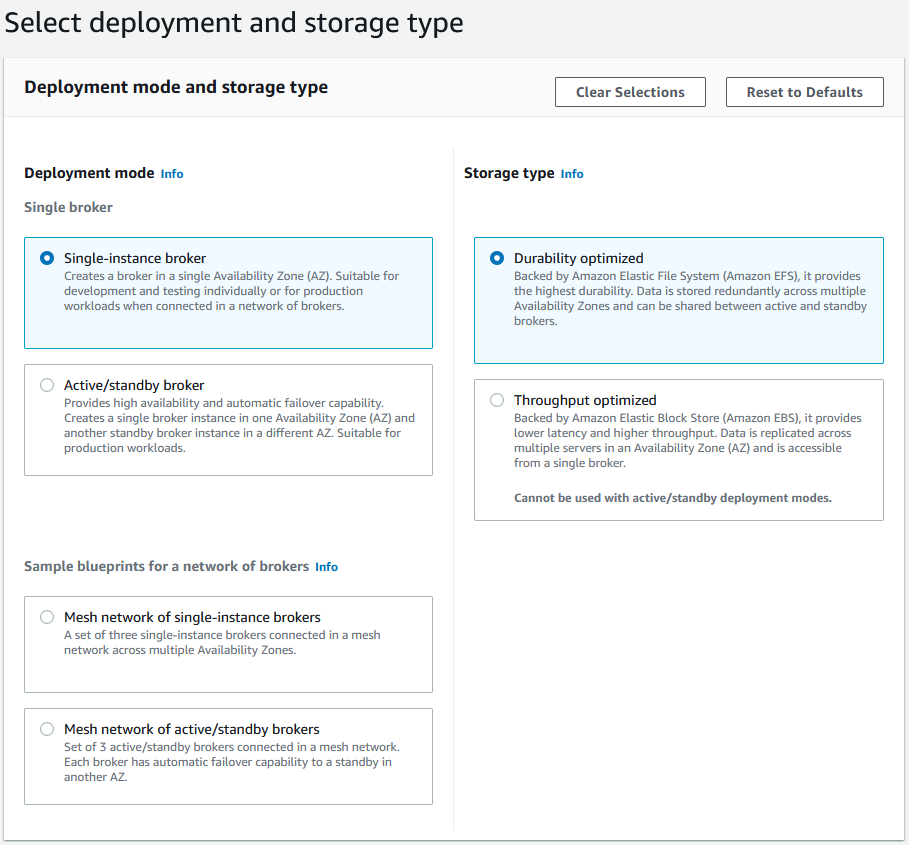
- Select Single-instance broker as Deployment Mode
- Select Amazon Elastic File System (EFS) as Storage type.
4. On the Configure settings page
- Broker name: provide broker name
- Broker instance type: For more information
- Provide User Name and Password for access ActiveMQ cluster.
In the addition setting you can configure broker network and security ,public accessibility and cloud watch . Here I will be use default settings. After adding necessary configuration click Create broker button to create broker.
It will take around 15mins to create activemq broker. Once broker create click on the broker and navigate to Edit page.
6. ActiveMQ Web Console
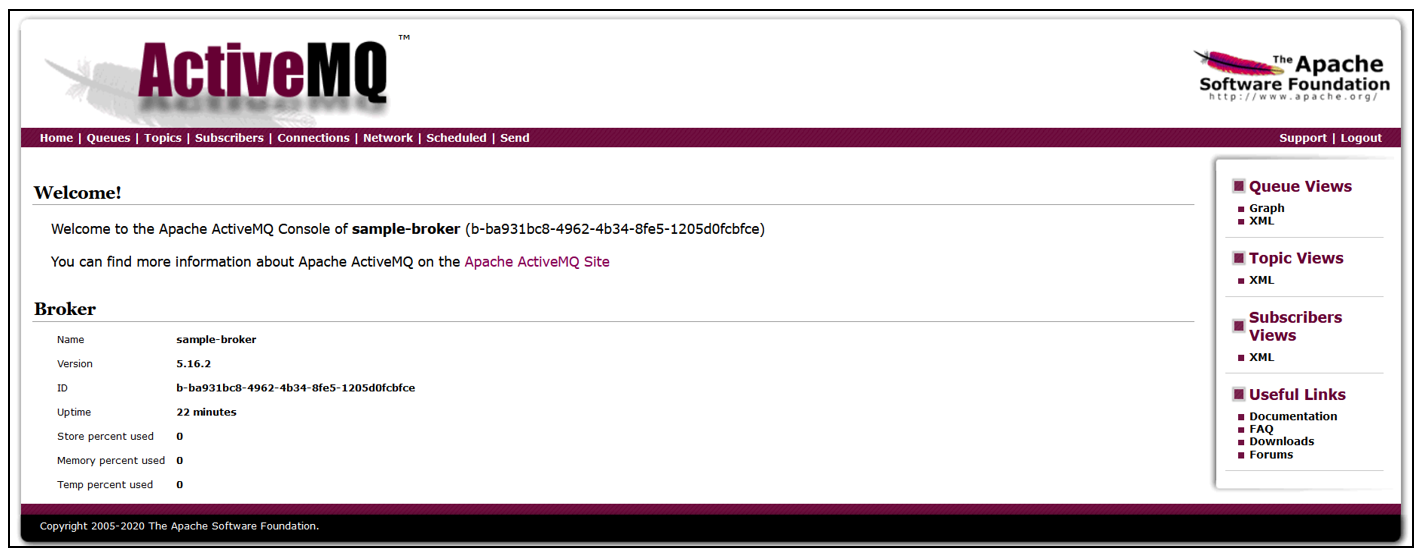
In the broker details page you can see ActiveMq Web Console link ,click on the link ,It will redirect to the ActiveMQ Web console.
6. ActiveMQ Enable Scheduler
If you navigate to the scheduled section ,we can see "scheduler not started!" message. To enable scheduler support edit the xml configuration schedulerSupport attribute to true .
On the Edit Broker page, in the Configuration section, select a Configuration and a Revision and then choose Edit. Update configuration by adding schedulerSupport="true"
Navigate to the ActiveMQ broker page and click on the Edit button. On the Configuration section select the Revision version that we create.
Click on the Schedule modifications button ,click on the Immediately option it will reboot the broker right away.
After reboot complete ,you can navigate to the activemq console web ,scheduled section you can see following table.
1.) Create Asp.net core 3.1 web Api application using visual studio.
In here I am not going to describe in details how to create .net core application. You can download the source code in my GitHub repository as I mention above.
After create application install the following Nuget Packages.
2.) Add ActiveMQ connection string to appsettings.json.
Here I register all dependencies as extensions inside the ConfigureServices method in the Startup.cs. Use the built-in transport message delay to schedule messages.
A publish endpoint lets the underlying transport determine the actual endpoint to which the message is sent. In here we are using IMessageScheduler.ScheduleSend method to schedule message in the ActiveMQ.
- DestinationAddress : The destination address where the schedule message should be sent.
- ScheduledTime : The time at which the message should be delivered to the queue
- Message : The message that need to publish.
5.) Create Controller class Post method to expose the publisher service to the outside.
Consumer Application Implementation
1.) Create Asp.net core web Api application and add Nuget packages using visual studio.
Delete Controller classes and UseRouting , UseAuthorization and UseEndpoints Configure method in Startup.cs class.
4.) ActiveMQ Consumer Message Filter and Re-try
5.) ActiveMQ Consumer class.
** Download the source code and customize according to your scope. Github repository mention above.
Execute Publisher and Consumer
Once you run the consumer application, MassTransit will create queue and topic for you. If there any error or exception occur MassTransit will create error queue to manage error messages as well.
Execute the publisher application , Here I attached the sample post-man collection to execute the publisher controller. I put future time for scheduled time and rest of the details sample values.
After execute the publisher controller, It will send the message to the ActiveMq, you can see the schedule messages in ActiveMq console in scheduled section. Once it satisfied the next scheduled time, consumer will consume the message and send the email to the relevant party.
Conclusion
In this article, We setup AWSMQ ActiveMQ broker and enable schedule message option and also implement simple .Net core publisher/subscriber application to schedule message using MassTransit.
Enjoy!!! stay safe


Comments
Post a Comment